Mozilla Composer Tutorial
The Mozilla Composer User Interface
When you launch Mozilla, you'll see that it is actaully the Mozilla browser that comes up first. That's ok, because that's what the program is supposed to do. The easiest way to launch Composer is to click on the Component Bar at the bottom of the browser:
The button that opens Composer looks like a page with a globe and pen next to it:

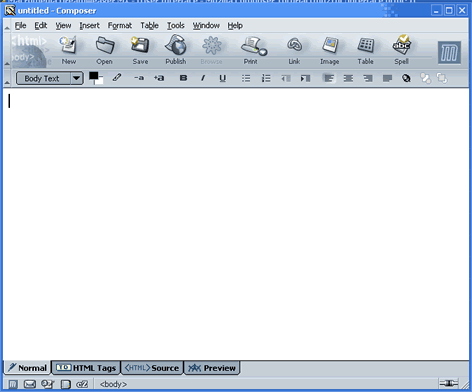
After you click on the Composer button, you get your first glance at Composer in all its blank glory:
Menu Items
Thankfully, a great deal of the interface looks very much like a word processor. The entries on the menu bar are pretty standard. Below is a list of the menu item and the major component that is to be found under it.
File
Nothing special here. Open, Close, and Save are all present.
Edit
The Paste Without Formatting command is found here. It can be very useful for pasting information from other programs. The Preferences command is also found here. Without going into too much detail, just know that you can control how Composer handles some stylesheet and HTML options.
View
You can switch through the different views of Composer here. There will be more details about the views later in this document. Under the Show menu, you can show/hide user-interface elements if you like.
Insert
Much of what makes Composer useful is found here. You can insert Images, Tables, Links, Named Anchors, Horizontal Lines, HTML, Characters and Symbols, and a Table of Contents. All the things just mentioned that are hyperlinks have a section explaining exactly what they are, but the others will be explained here. A Horizontal Line is just that: A gray horizontal line like this:
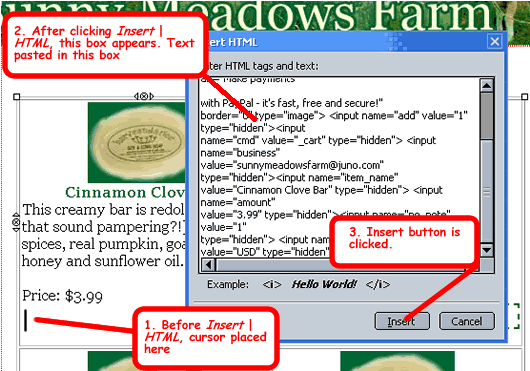
Inserting HTML means placing raw HTML in the spot where the cursor is placed. If you know HTML or need to paste some in that you find elsewhere (i.e. pre-generated PayPal buttons), place the cursor in the document where you want that piece of HTML to be placed, click on Insert | HTML, and paste that code in the box, then click the Insert button. The screenshot below shows the steps used for pasting in the code used to create PayPal buttons on the Sunny Meadows Farm site:
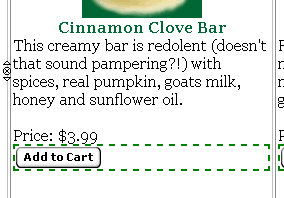
The HTML pasted in created a form button where the cursor was placed, as can be observed in the screenshot below:
Clicking on Insert | Characters and Symbols allows you to insert characters such as © and ®, and characters used in languages other than English like À and ó.
Insert | Table of Contents allows you to easily generate links to other sections within a document based on the heading structure of the document. The specifics of this feature will not be addressed in this tutorial, but for more information on headings, see the Using Text section.
Format
The Format menu has all the common elements for formatting text that you would find in a text editor. Of great importance is the Discontinue Text Styles command. If you have a line of formatted text and press Enter, the next line will share the formatting of the line you just came from. To return the text to the document default on the new line, you can click Format | Discontinue Text Style. In the screenshot below, the Big Text was made bigger using the Increase Text Size command (see Using Text) and the text was returned to the default document size by clicking on the Discontinue Text Styles command:
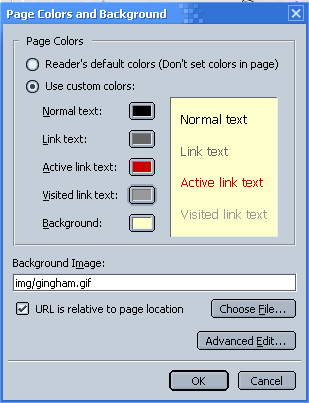
Another thing on the Format menu that is very important is the Page Colors and Background command. This is where you can set the colors for your text, links, and background, or add a background image for your site. When you click the Page Colors and Background command, you can set the properties by clicking the Use Custom Colors radio button. Below is a screenshot of the Sunny Meadows Farm color scheme being set with this command:
The final thing that is very important about the Format menu is the Page Title and Properties command. This is how you set what appears in the title bar of a browser window as well as the meta data for a page. Here's a look at Sunny Meadows Farm's title and meta data being set with the Page Title and Properties Command:
Table
(See Tables)
Tools
The Tools menu contains some excellent, yet somewhat advanced tools. Therefore, its contents are beyond the scope of this tutorial. Just remember that those features are there and come back to them if you ever get really serious about web design.
Window
The Window menu allows you to reach all the components found in the Component Bar. It also allows you to switch back and forth between any open windows that are part of the Mozilla suite.
Help
Mozilla's built-in help is pretty extensive, howbeit lacking of pictures. If you get really stuck or want to know more about the advanced functions not covered here, this may be a good place to start.
Toolbar
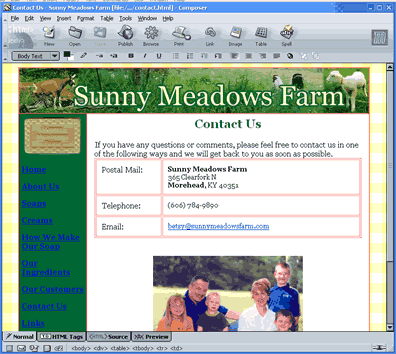
Moving further down our Composer window, you can't help but notice the toolbar. Most of the toolbar buttons corespond to one option or another found in the menus. Here's a look at the default toolbar setup:

Explanations of what all the buttons do can be found in the corresponding part of this tutorial.
The most important two elements of Composer are actually found at the bottom of the window: the four different views and the Elements Bar:

Editor Views
The four views are Normal, HTML Tags, HTML Source, and Preview. The following descriptions of each view are taken directly from the Mozilla help file because no other explanation would do anything to augment the purpose of each view. This tutorial will add screenshots of each view:
Normal: Choose this editing mode to see how the document will look online while you are creating it. Choose this mode to show table borders and named anchor icons. All other HTML tag icons are hidden.
Show All Tags: Choose this mode to show all HTML tag icons.
<HTML> Source: Choose this mode to view and edit the document as unformatted HTML source code. When you save the document, the Normal mode reappears.
Preview: Choose this mode to display and edit the document exactly as it would appear in a browser window, except that links and JavaScript functions will not be active.
Note: JavaScript functions, frames, links, Java, embedded objects and animated GIF files are not active in any of the editing modes. To display these items in their active state, click the Browse button on the Composition toolbar to load the page into a browser window.
Element Bar
The element bar allows you to target a specific HTML element very easily, even if it is nested within another element. HTML is arranged in tag and almost all of them have an opening tag and a closing tag. Elements are contained inside each other in a sort of heirarchy. Look at the following screenshot of the Elements Bar:
![]()
The <body> tag holds all the tags to the right of it, the <div> tag holds those to the right of it, and so on. In the Normal editing view, clicking on any tag highlights everything that is contained within that element. In the following screenshot, the <td> tag has been clicked:
All the stuff that is highlighted is contained in the <td> tag. The <td> tag stands for "table data," which in HTML represents a row in a table. Sadly, there is no way you can use the element bar effectively without knowing a little HTML. Right-clicking on a tag in the element bar allows you to open up advanced options pertaining to that specific tag. Some of these advanced options will be covered in other parts of this tutorial dealing with specific elements.
| <<Previous Section: Getting Mozilla |
Copyright ©2004-2006
Jerry Smith
Direct any questions or comments to tsmith0@tds.net